Mastering ADetailer (After Detailer) in Stable Diffusion
Gain exclusive access to advanced ComfyUI workflows and resources by joining our Patreon now!
If you’re a Stable Diffusion enthusiast dabbling in portraits, you might have encountered a common hiccup: disfigured faces.
This challenge isn’t unique to Text-to-Image AI tools; even the formidable Midjourney V6 isn’t immune.
While it manages well with individual portraits, introducing more characters into the scene often leads to control issues. Take a peek at this image generated by Midjourney V6. On closer inspection, you’ll spot the distortions.
Correcting single portraits in Stable Diffusion? A breeze, thanks to inpainting. But what about images bustling with multiple faces? Should you really invest hours in rectifying a single image?
I bring you good news: a powerful, time-saving extension for Stable Diffusion users is on the horizon.
Let me guide you through this nifty tool in this article, covering everything from installation to a deep dive into its parameters. Ready to elevate your skills? Let’s jump in!
Installing ADetailer
The process mirrors installing almost any extension in A1111.
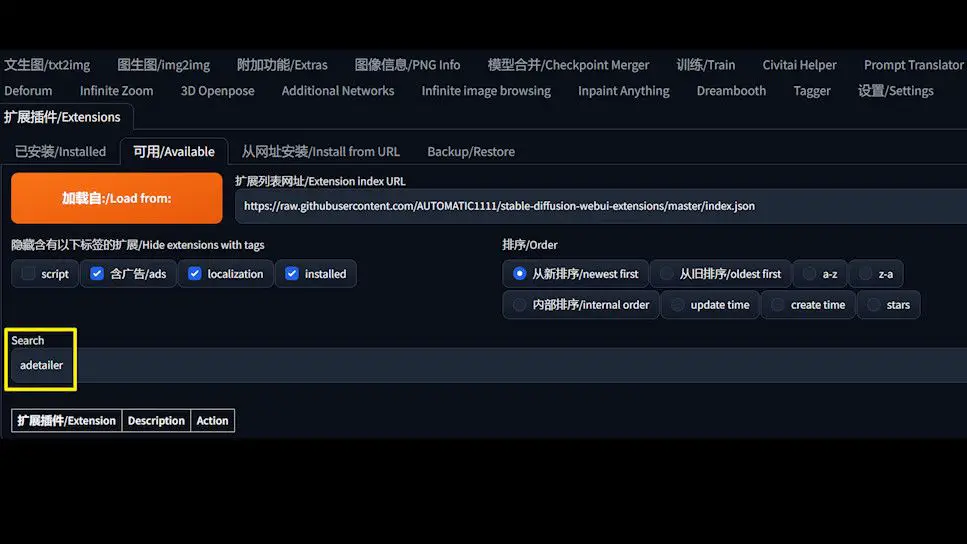
Head to the extension tab in WebUI, click on ‘Available’, and search for ADetailer. It should pop up in the list. Click ‘Install’.
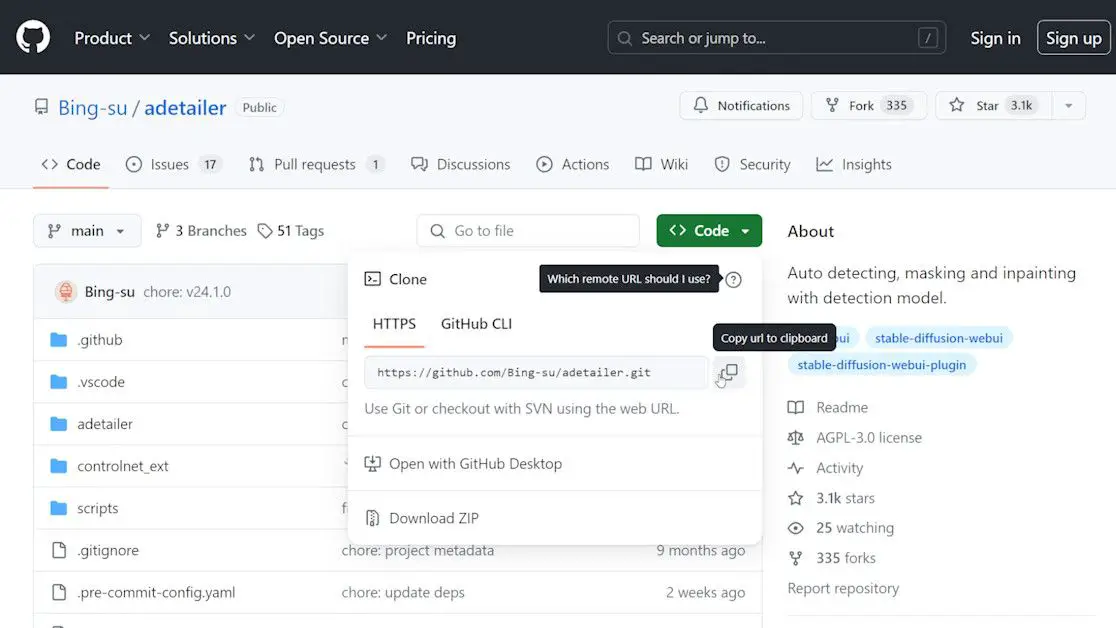
If it’s elusive, there’s a plan B: install directly from a URL. Head over to the project’s GitHub page, easily found by searching “ADetailer Stable Diffusion.”
On Github, click the code button, Then copy the URL from the pop-up window.
On GitHub, you’ll not only find the installation URL but also comprehensive instructions and troubleshooting tips.
Some models may require additional downloads, which you’ll need to move to the “webui/models/adetailer” folder. Once you’ve got the URL, return to WebUI, paste it in, and click install.
You’ll then find ADetailer in the ‘Installed’ tab.
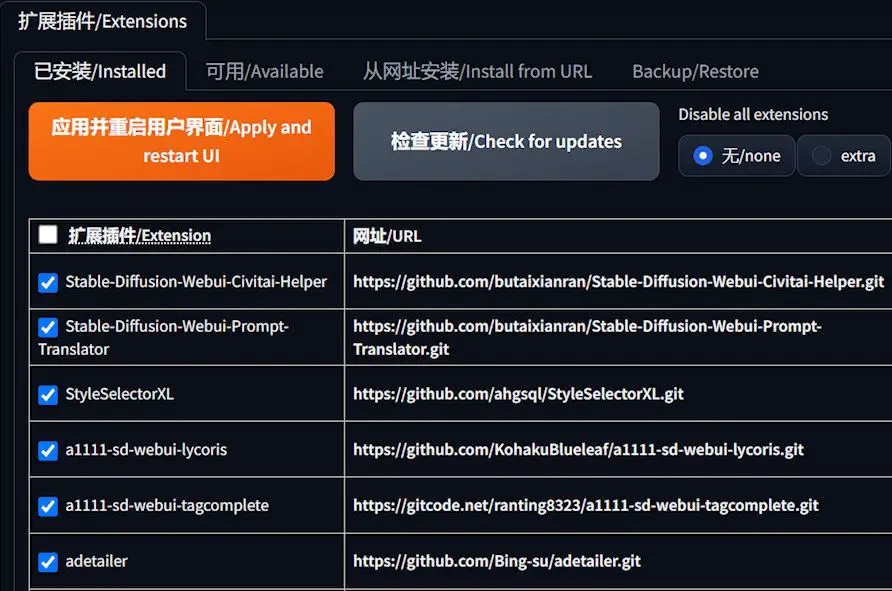
Apply it and restart the UI. Back in the txt2img or img2img screen, ADetailer awaits your command.
Testing ADetailer’s Magic
Let’s put ADetailer to the test.
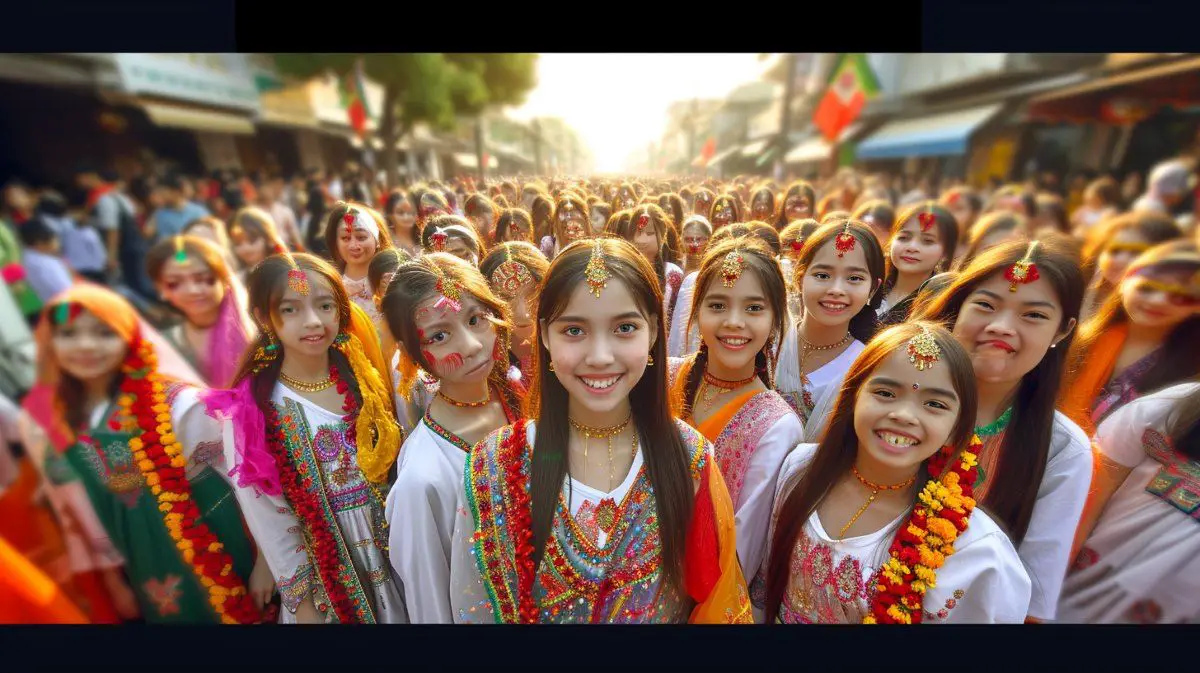
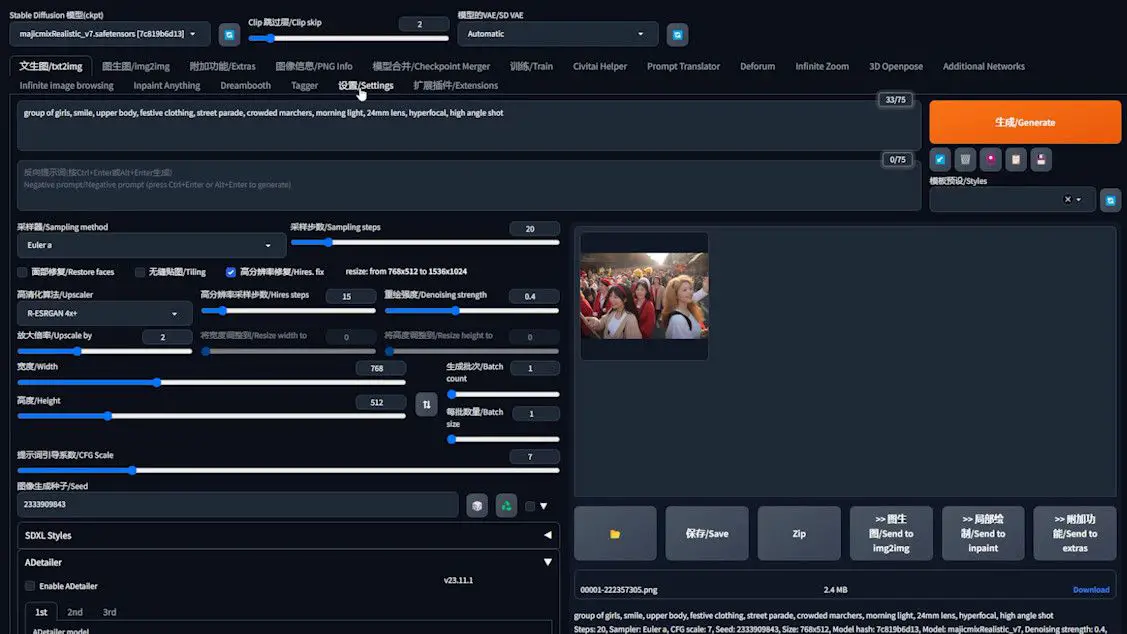
First, generate an image using your preferred model – I’m going with “Majicmixrealistic” here, adhering to the author’s suggested settings.
As expected, the photo isn’t perfect: the front faces look decent, but the back row? Distorted.
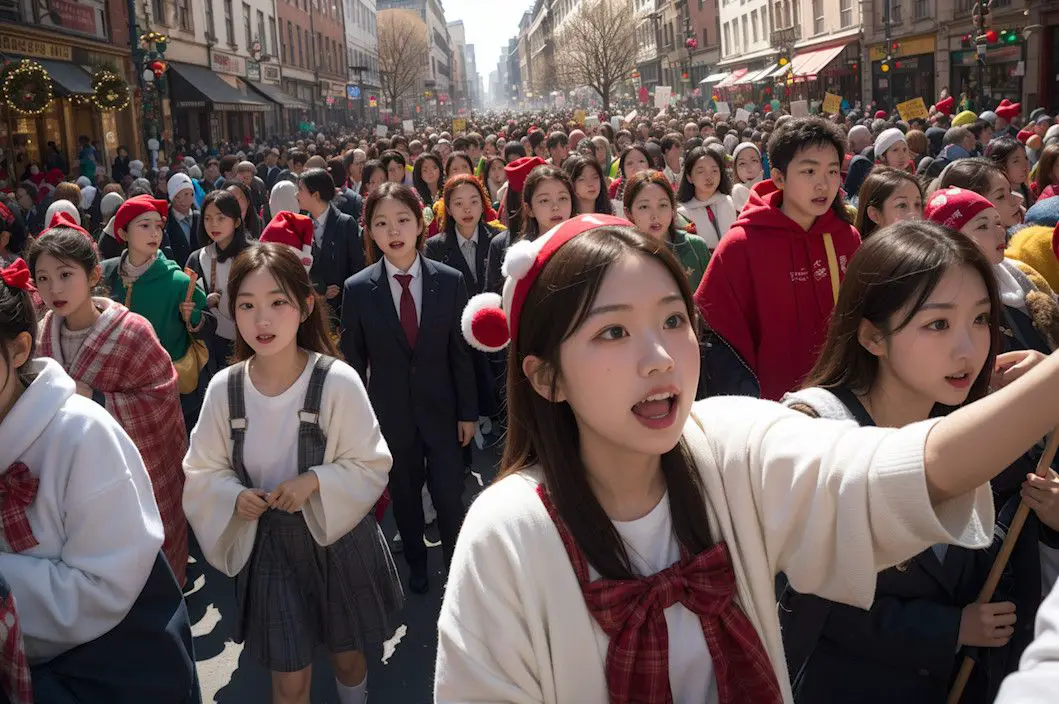
Imagine manually fixing each face – exhausting, right? Thankfully, ADetailer offers an elegant solution.
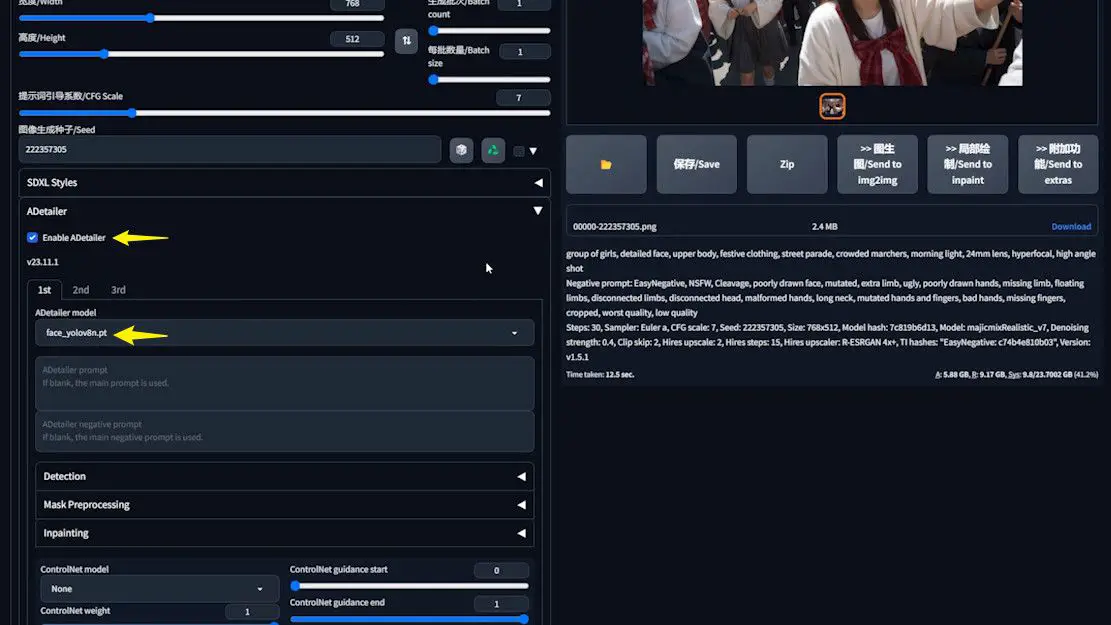
Fix the seed, then open the ADetailer extension. You’re greeted with a variety of models to choose from.
Let’s start with one of the default models, which I’ll elaborate on shortly.
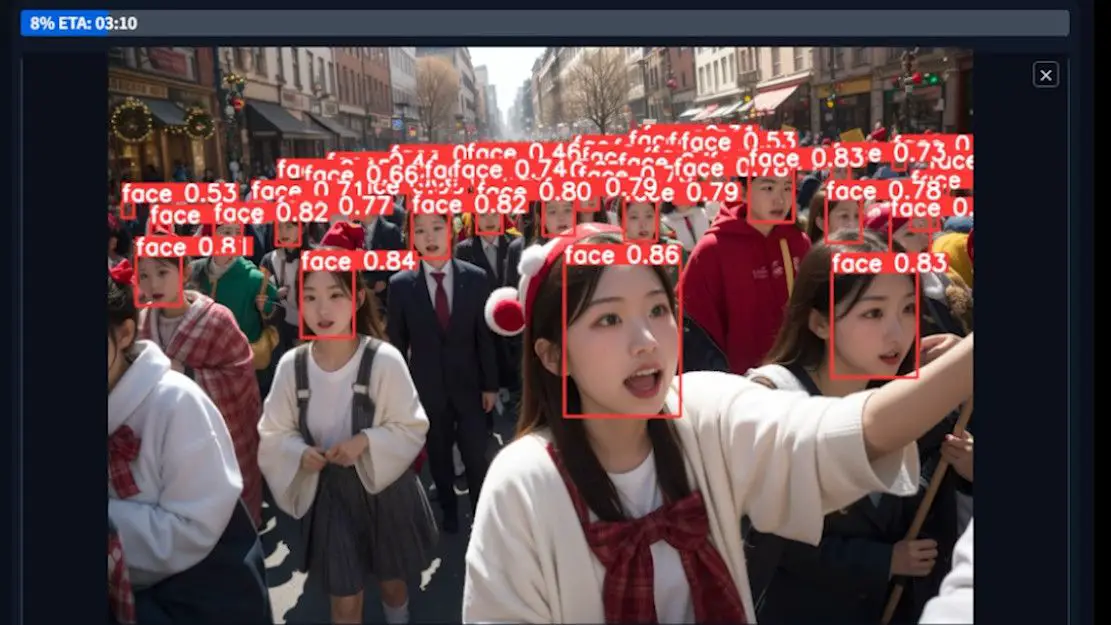
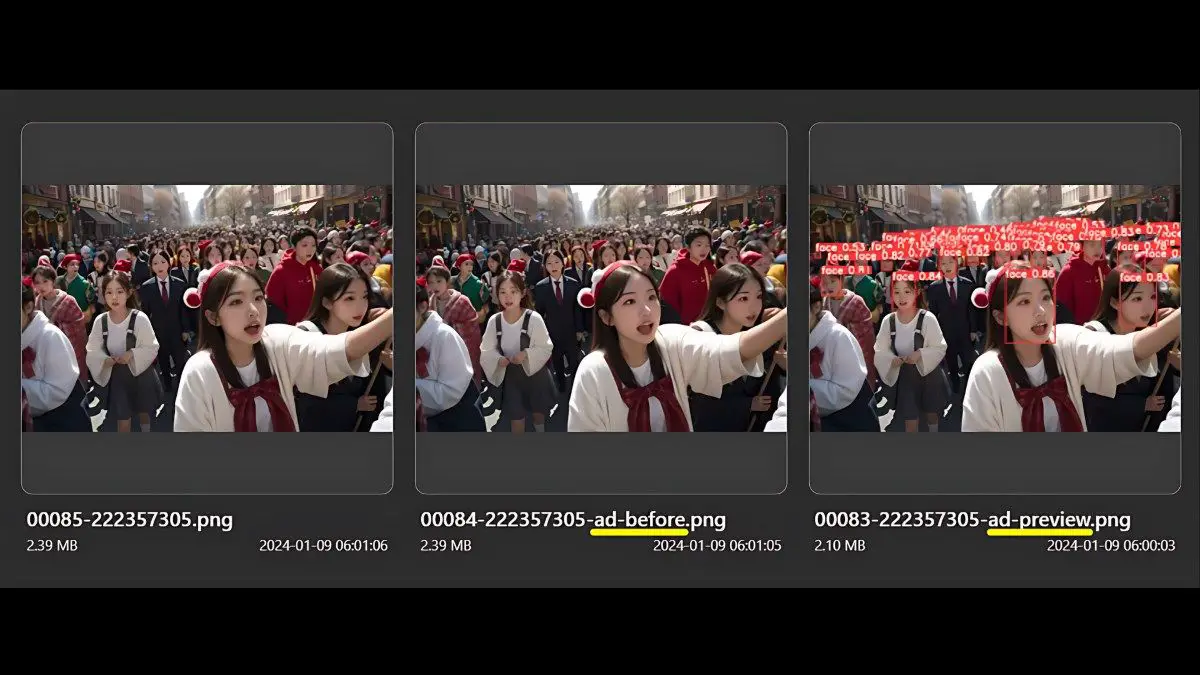
After enabling ADetailer, regenerate the image and observe the preview window. Red boxes, each numbered, highlight the faces being processed.
On completion, marvel at the enhanced faces. Compare this with the original for a stark contrast. For a more vivid comparison, I’ve prepared a zoomed-in side-by-side.

Model Explanation and Comparison
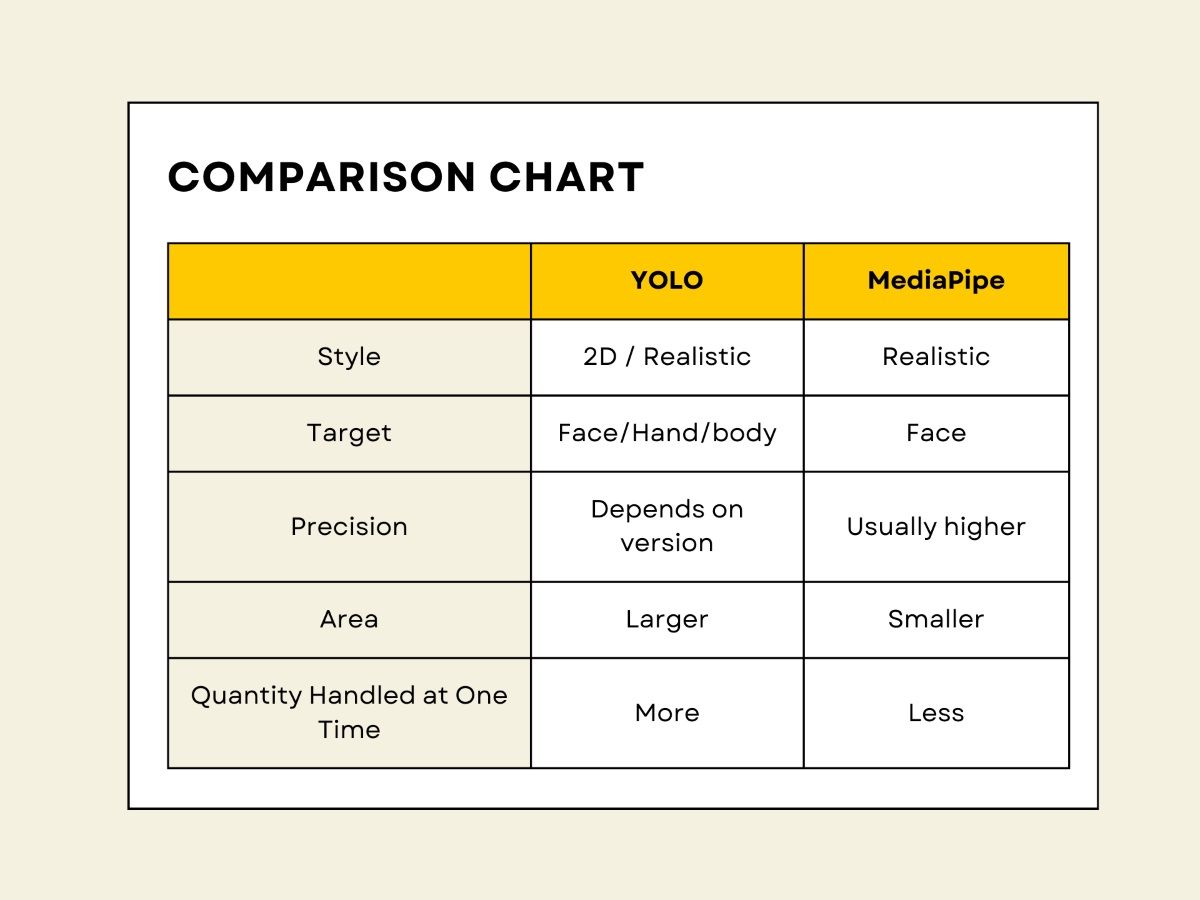
ADetailer offers a plethora of models – 14, to be exact.
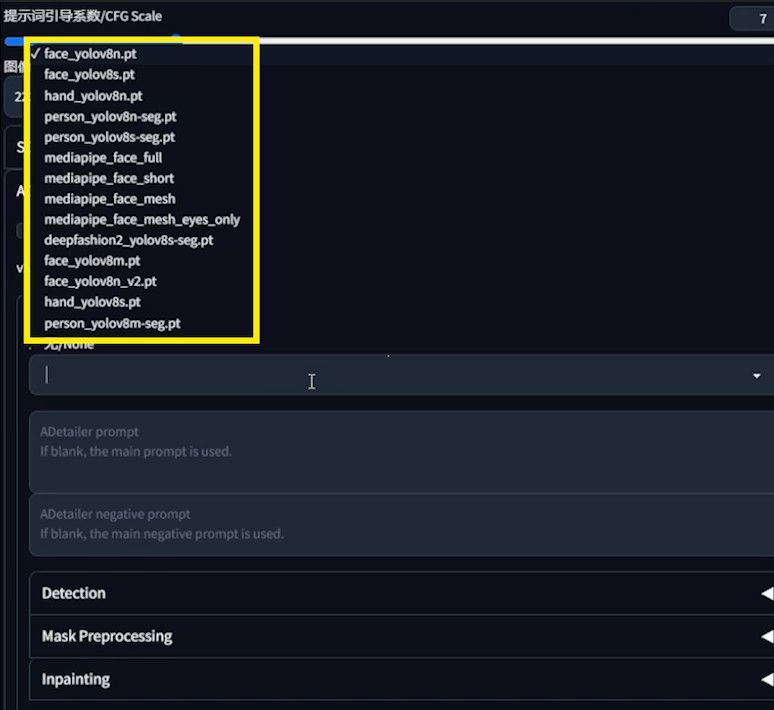
Choosing can be tough, but let me clarify the differences. These models are divided into three categories. Models that contain “face” in their name are those that deal with the face. If it contains “hand”, it’s for the hand. If it contains “person”, it’s for the body. “DeepFashion” is an exception. I’ll ignore it in this tutorial.
In terms of processing algorithms, they’re split into two groups: “YOLO” for generalized object detection, and “MediaPipe” for specialized face detection.
MediaPipe models offer higher facial feature accuracy. YOLO models, depending on their version and training, vary in accuracy.
The picture shows their processing areas.
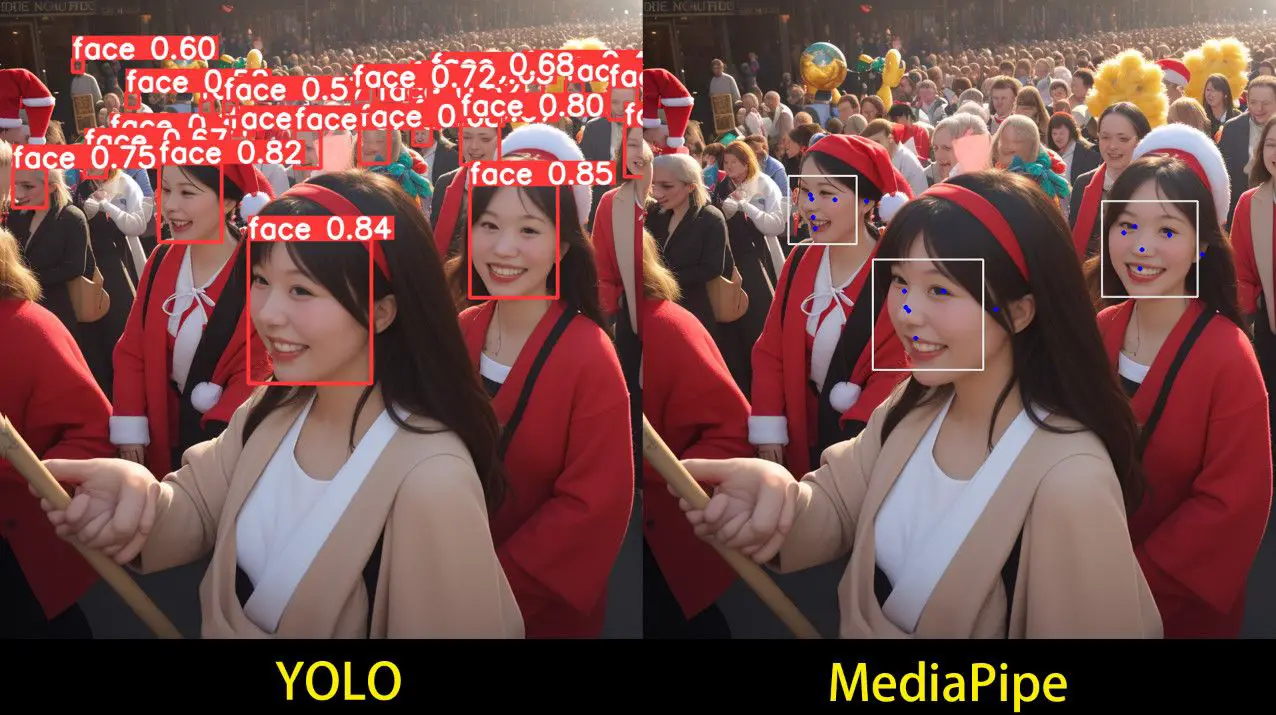
MediaPipe focuses on smaller, more precise areas labeling multiple facial features. But it struggles with side views or small faces.
YOLO handles more faces and larger areas, even including hair and background. I’ve created a table for easier reference.
Let’s separate YOLO and MediaPipe for clarity. YOLO has 10 models ending in “.pt”, indicating the file type.
The file name’s number indicates the version, currently version 8. The letters “s”, “n”, and “m” represent the model size: small, nano, and medium. Smaller models are faster but less accurate. Consider speed and accuracy when choosing.
Let’s compare “V8M” and “V8N” from the YOLO family.
According to my explanation. “V8M” and “V8M” are the two most different models in the “YOLO” family. Let’s take a look at their comparison image.
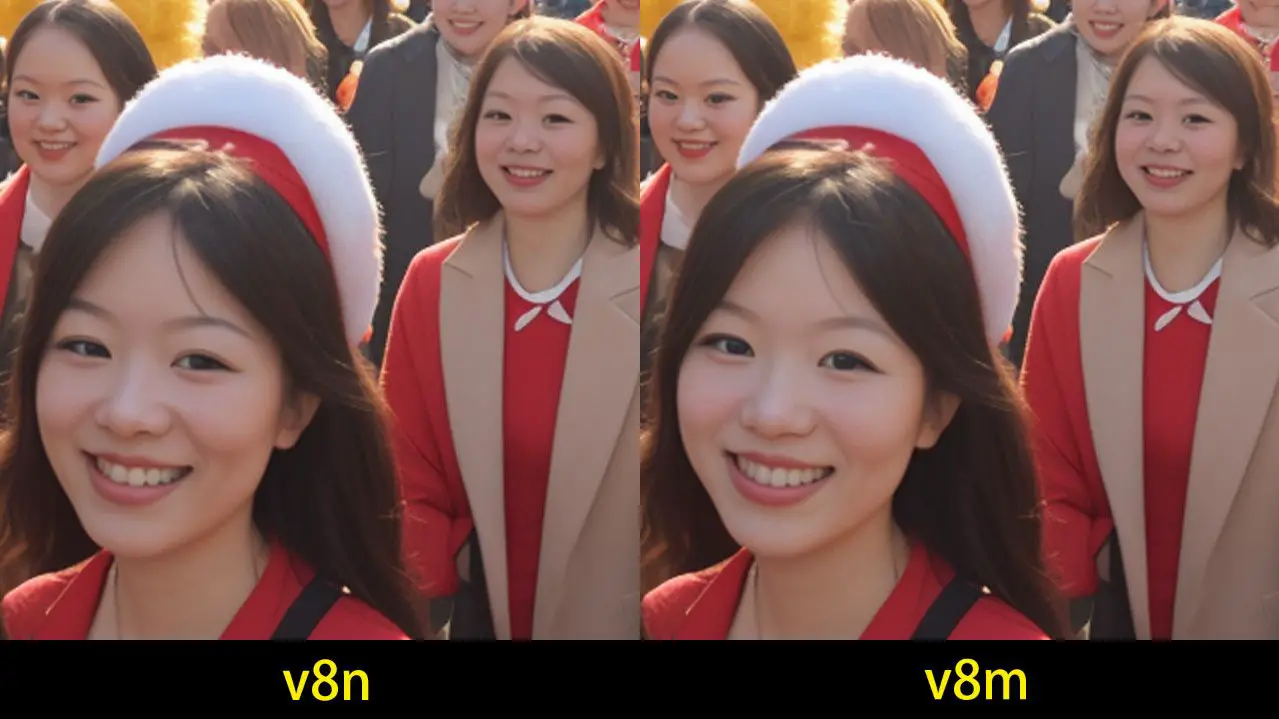
Take a closer look. The differences are quite obvious. “V8M” looks more detailed than “V8N”. Yolo also offers hand restoration models, which you can observe in action.
Exploring MediaPipe’s versions, we have “full”, “short”, “mesh”, and “mesh_eyes_only”. To clarify, I’ve created a comparison image.
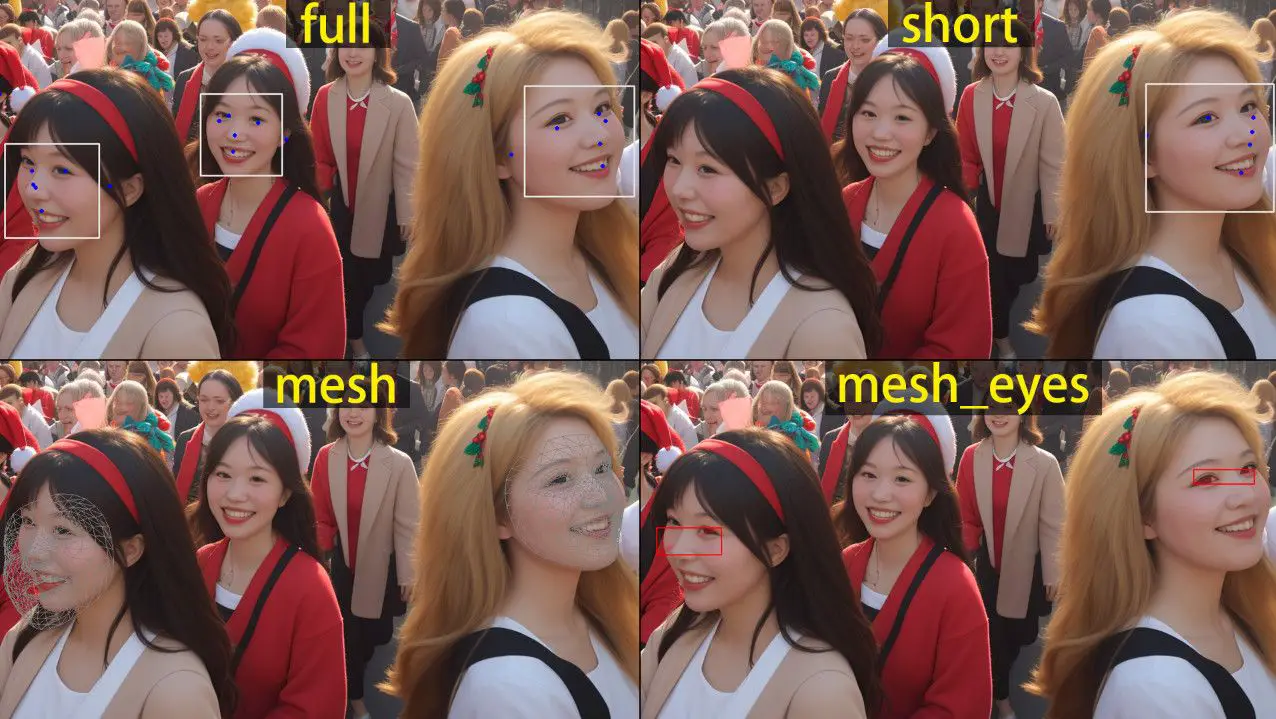
Looking at the top part, let’s examine “full” versus “short”. “Full” is comprehensive, detecting more facial features. The blue dots represent detected features. “Full” shows more dots on the girl’s face on the far right than “short”.
While “full” identifies three faces, “short” recognizes only the rightmost one. “Mesh”, implying a net-like approach, offers a thorough, three-dimensional detection of faces. It excels in analyzing facial expressions.
Then there’s “mesh_eyes_only”, focusing solely on the eyes. Ideal for detailed eye restoration.
Curious about the figure with numbered boxes used for comparison? Let’s revisit the “WebUI” for that.
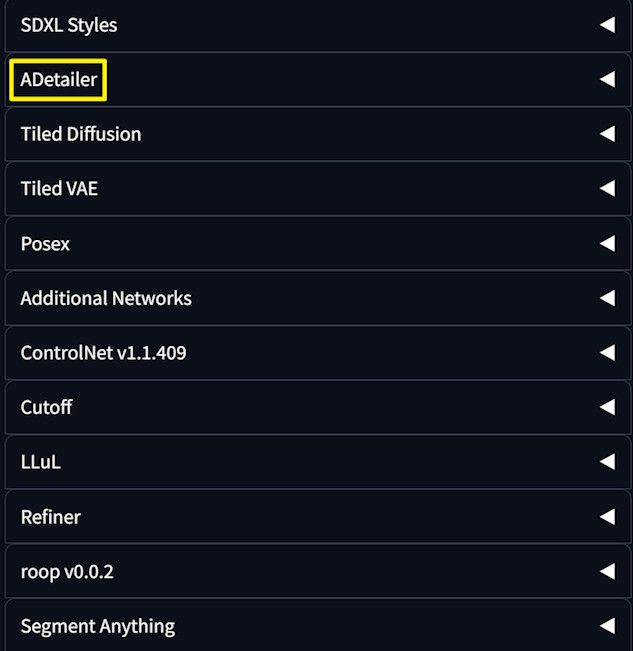
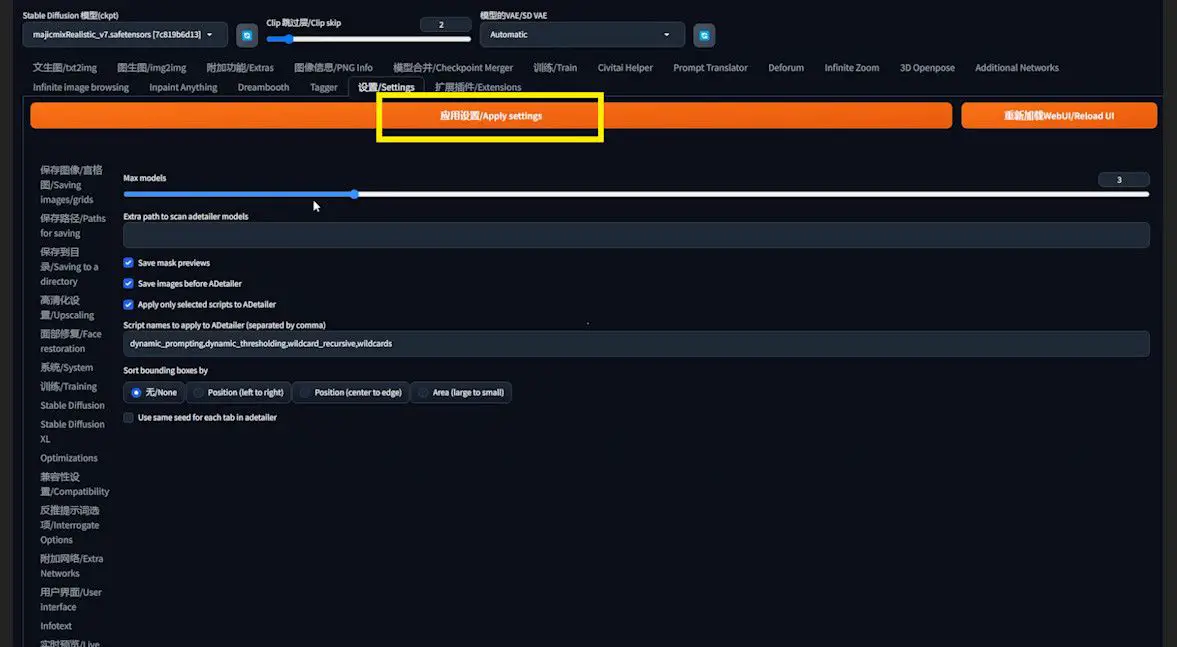
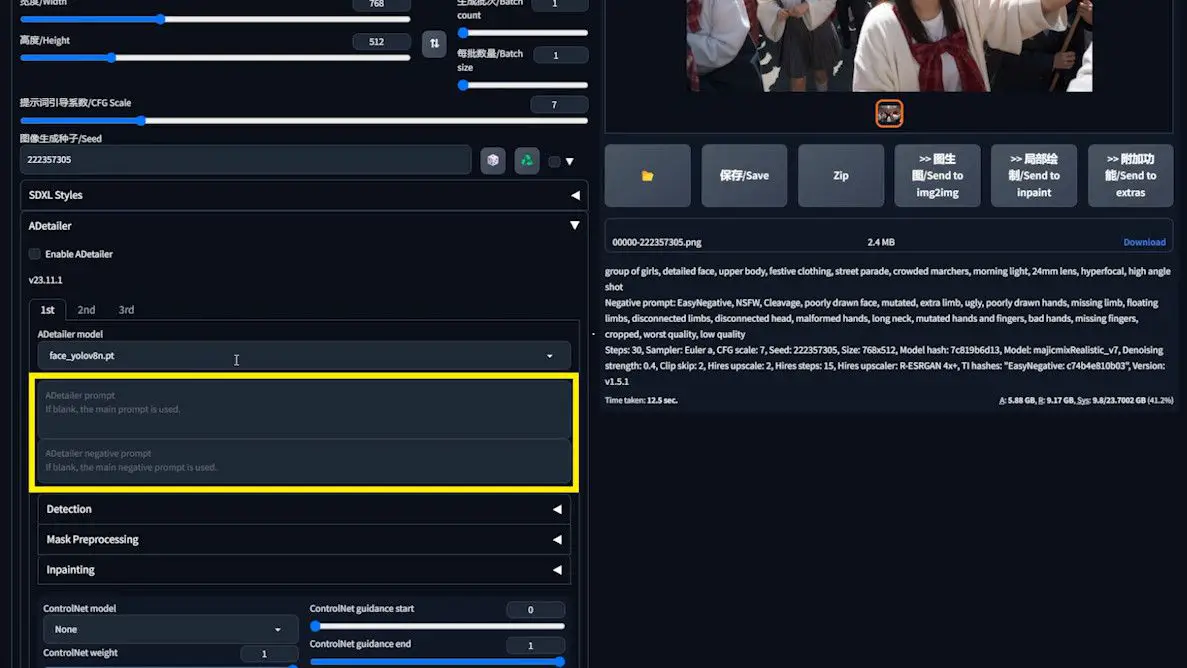
On the left hand side of the list of options, find ADetailer. Click on it, and you’ll be taken to the ADetailer settings page.
Enable “save mask previews” for an image showing the bounding box process. “save images before” generates an unprocessed image. These images appear in the generation folder, labeled “ad-before” and “ad-preview”.
“max_models” sets the number of simultaneous models, like one for face and another for hands. I’ve chosen three models here. To make all the settings I’ve just changed take effect, I have to click Apply settings, then click “Reload UI”.
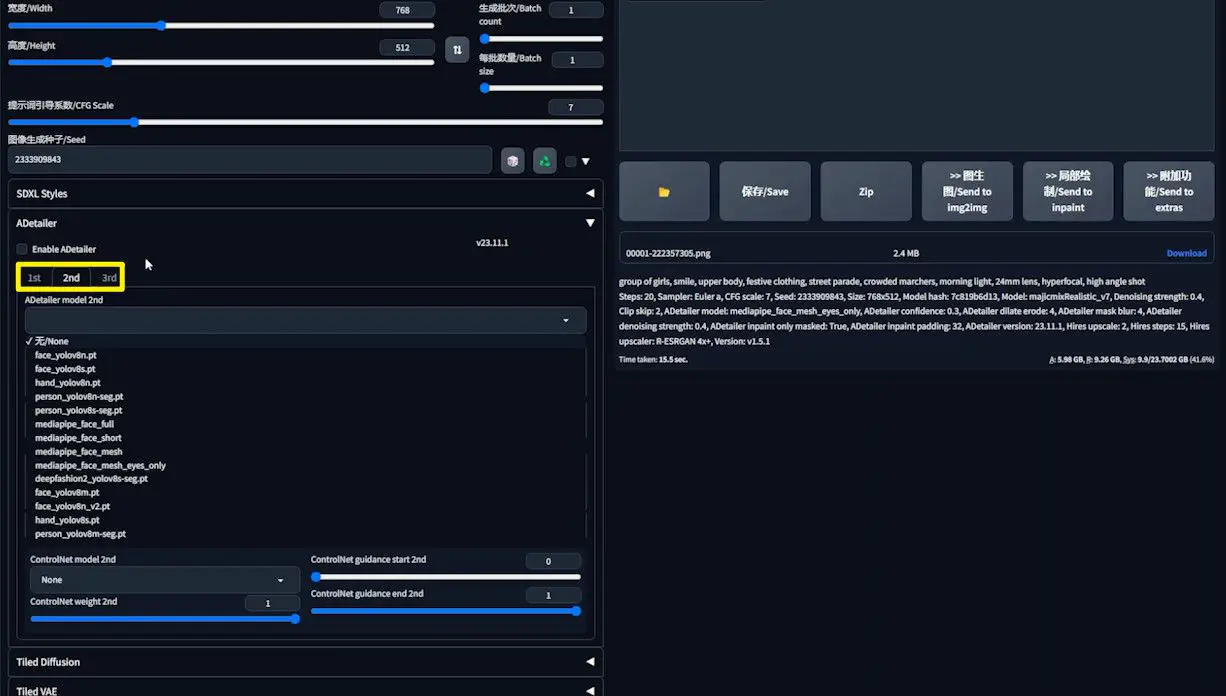
In the ADetailer interface, select models and settings in the “1ST”, “2ND”, “3RD” tabs.
Fine-Tuning with ADetailer
Now that you’re equipped to choose the right model, let’s delve into ADetailer’s options and parameters. First, the image generation process: ADetailer allows prompt inputs, which significantly influence the output.
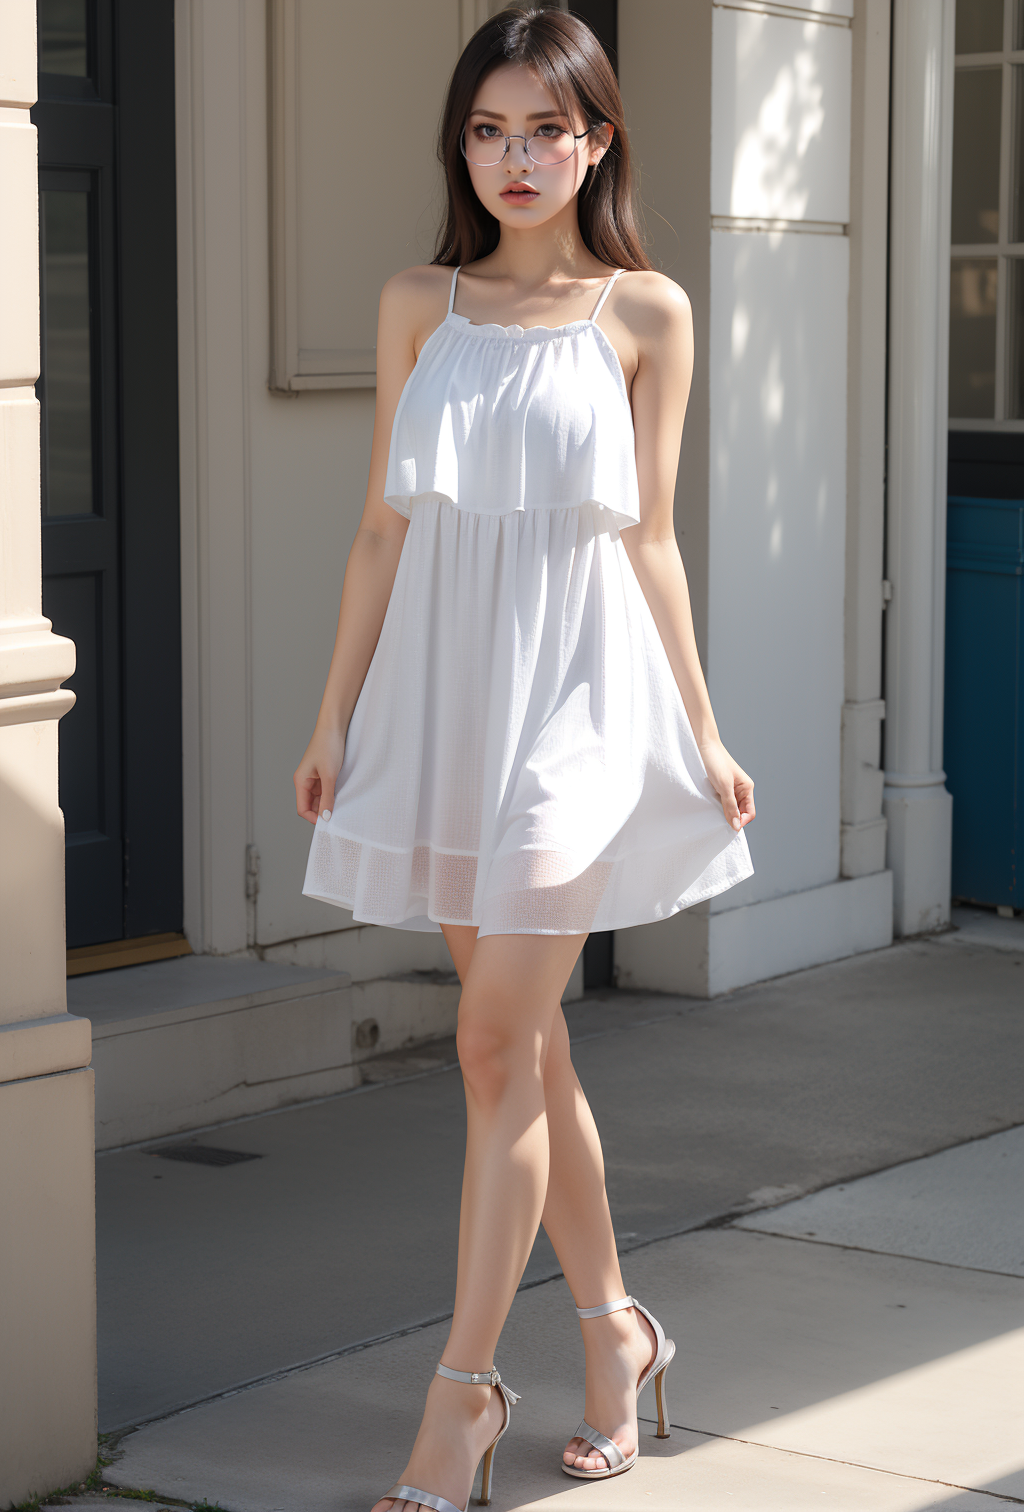
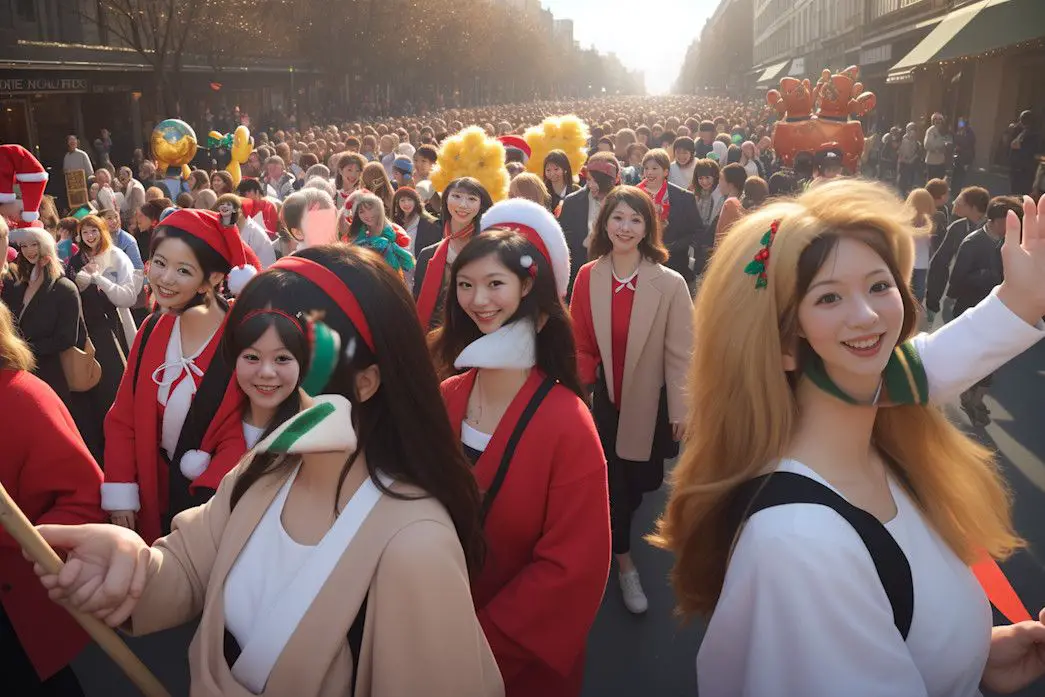
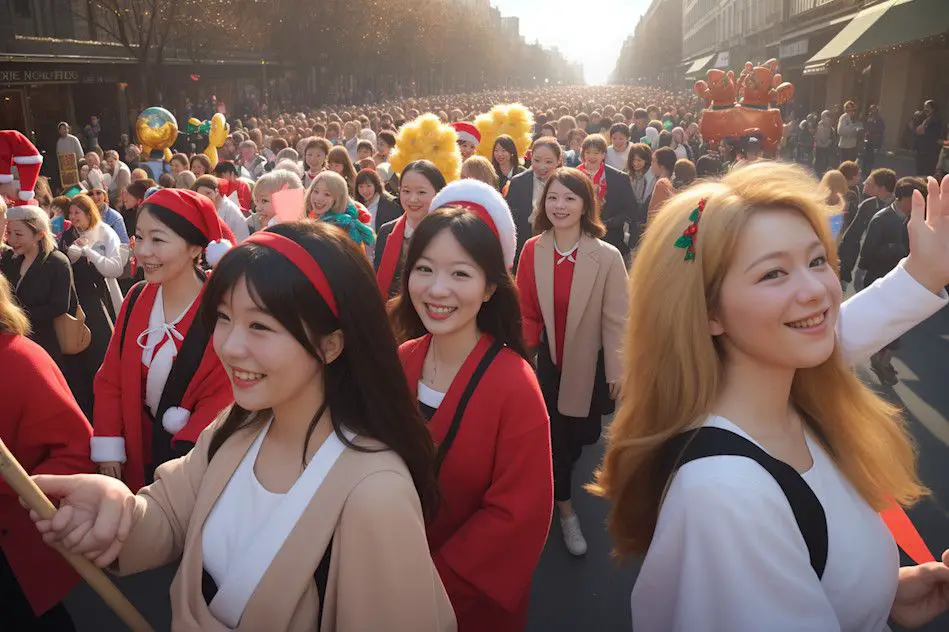
So, what role does the prompt play? Let’s say I generate an image like this.

Let’s add a prompt to the ADetailer.
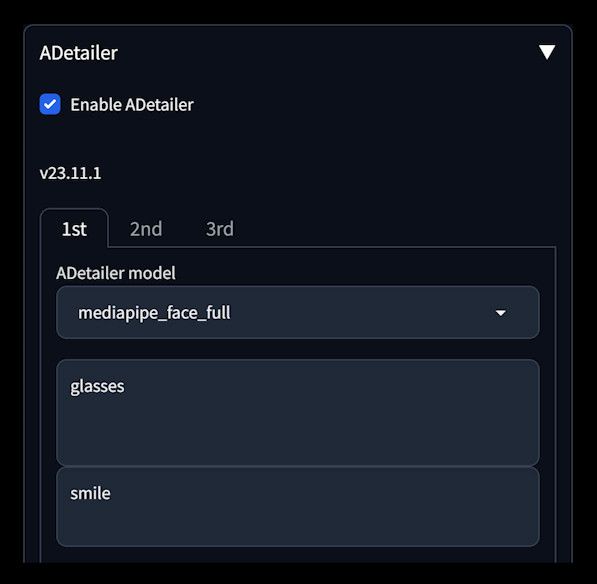
Add “glasses” as a forward prompt and “smile” as a reverse prompt. The result? A pair of glasses on the face and serious expression.
Makes sense, right? This is how prompts influence the output.
Let’s move on to the other parameter: detection model confidence threshold. What does this imply?
Set it to 0.85 and observe. Only faces with a confidence level above 0.85 get detected.
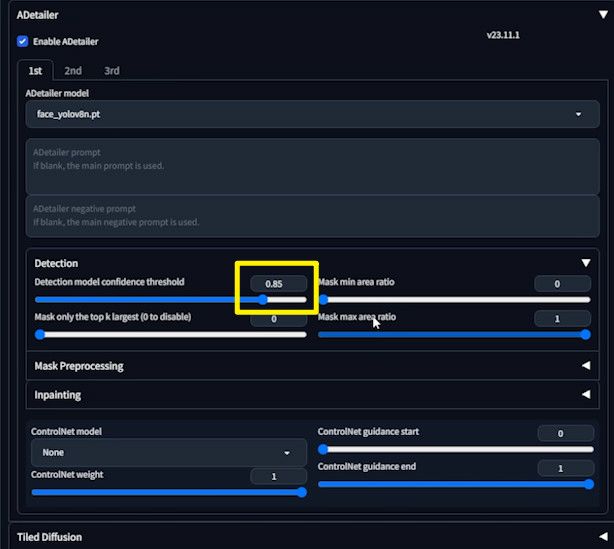
That’s the purpose of this threshold.
Another commonly used parameter is inpaint denoising strength. Setting it at 0.8, let’s see the impact.
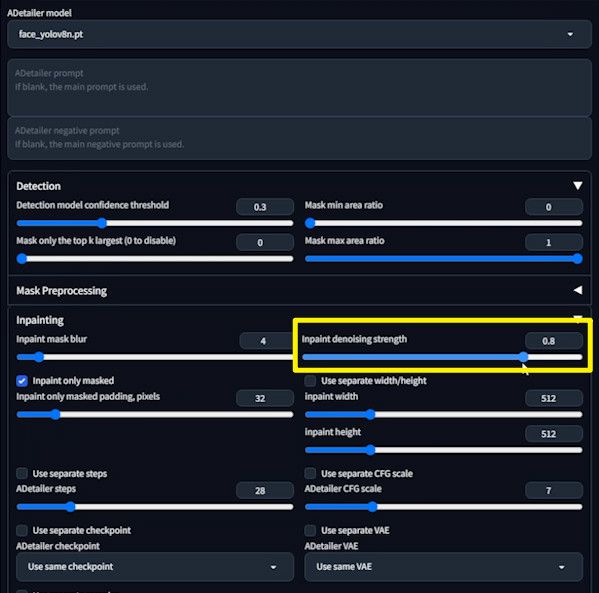
The result is overly altered, almost like a horror movie.
This parameter adjusts the extent of alteration in the repainting area. A setting of 0.8 is excessive; below 0.6 is typically advisable.
Let’s consider another parameter. Reset the inpaint denoising strength to the default 0.4.
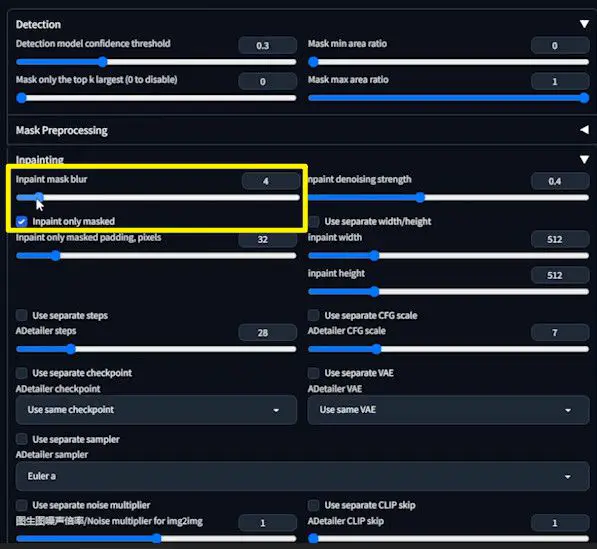
Then, set the inpaint mask blur to zero and examine the outcome.
The resulting image might look fine at a glance.
However, converting it to black and white and adjusting the contrast reveals an obvious seam. This occurs because ADetailer repairs faces within a rectangular bounding box.
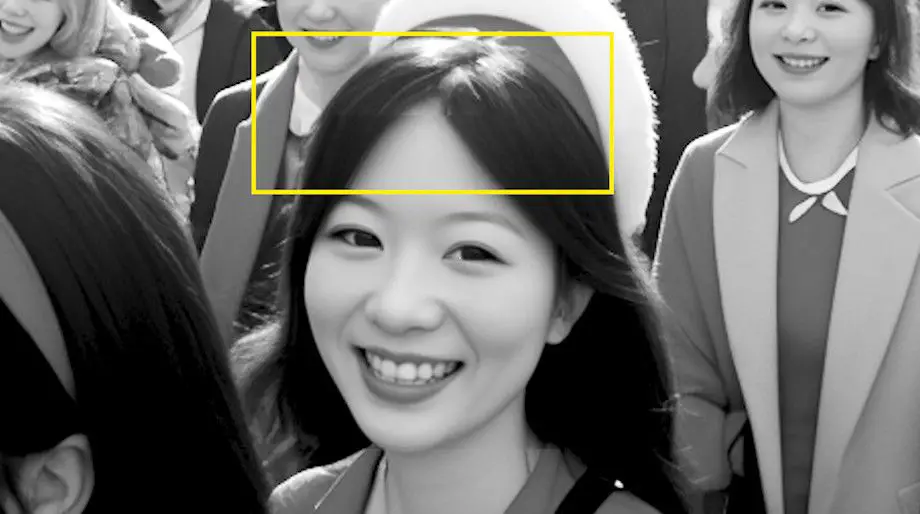
When blur is minimal, the transition between pixels inside and outside this box is harsh, creating noticeable seams.
Conversely, setting the inpaint mask blur to 50 results in a different issue.
Zoom in, and you’ll notice the girl’s face seems untouched.

That’s because a high blur value makes the bounding box effectively disappear, preventing ADetailer from detecting the face to work on. Understanding these parameters helps in fine-tuning the output for optimal results with ADetailer.
Wrap-Up
And there you have it – a comprehensive guide to using ADetailer with Stable Diffusion. Understanding these nuances ensures you can fine-tune images with precision, elevating your AI artistry. Thanks for joining me on this journey, and stay tuned for more insights in the future!