High-Similarity Face Swapping: Leveraging IP-Adapter and Instant-ID for Enhanced Results
In our journey through the fascinating realm of face-swapping technology, we previously navigated the intricacies of the LoRA model coupled with the Adetailer extension, achieving results that mirrored Scarlett Johansson with striking resemblance.
For those intrigued by the art of training a real-life LoRA model, I invite you to delve into my earlier discourse.

Yet, the excellence of LoRA comes with its complexities in training. Today, I unveil an alternative pathway to high-fidelity face swapping, devoid of LoRA’s complexities.
The technique discussed herein, while slightly trailing behind LoRA in similarity, stands out for its stellar performance.
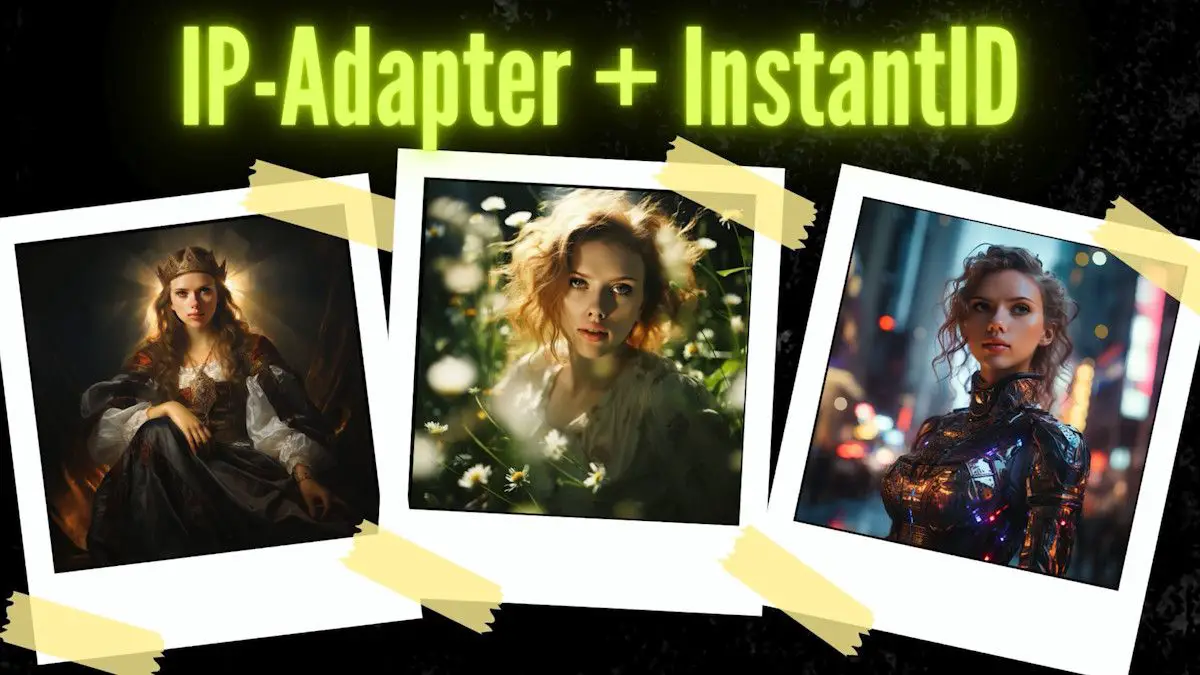
The confluence of IP-Adapter and Instant-ID within ControlNet for face swapping is acknowledged, albeit their occasional shortfall in achieving high similarity.
Our focus is a synergistic approach that amalgamates the strengths of both, setting a new benchmark in face resemblance.
Gain exclusive access to advanced ComfyUI workflows and resources by joining our community now!
Unveiling WebUI Forge
Our exploration is anchored in WebUI Forge, a superior iteration of WebUI. It eclipses its predecessor and ComfyUI in performance and introduces a suite of enhancements, including an upgraded ControlNet featuring a new IP-Adapter and a revamped Preprocessor.

Significant to our choice, the Preprocessor within Instant-ID has also been refined, bolstering our decision to employ WebUI Forge after observing subpar outcomes with IP-Adapter and Instant-ID in older WebUI versions.
To embark on the WebUI Forge journey, its GitHub repository offers a comprehensive installation guide.
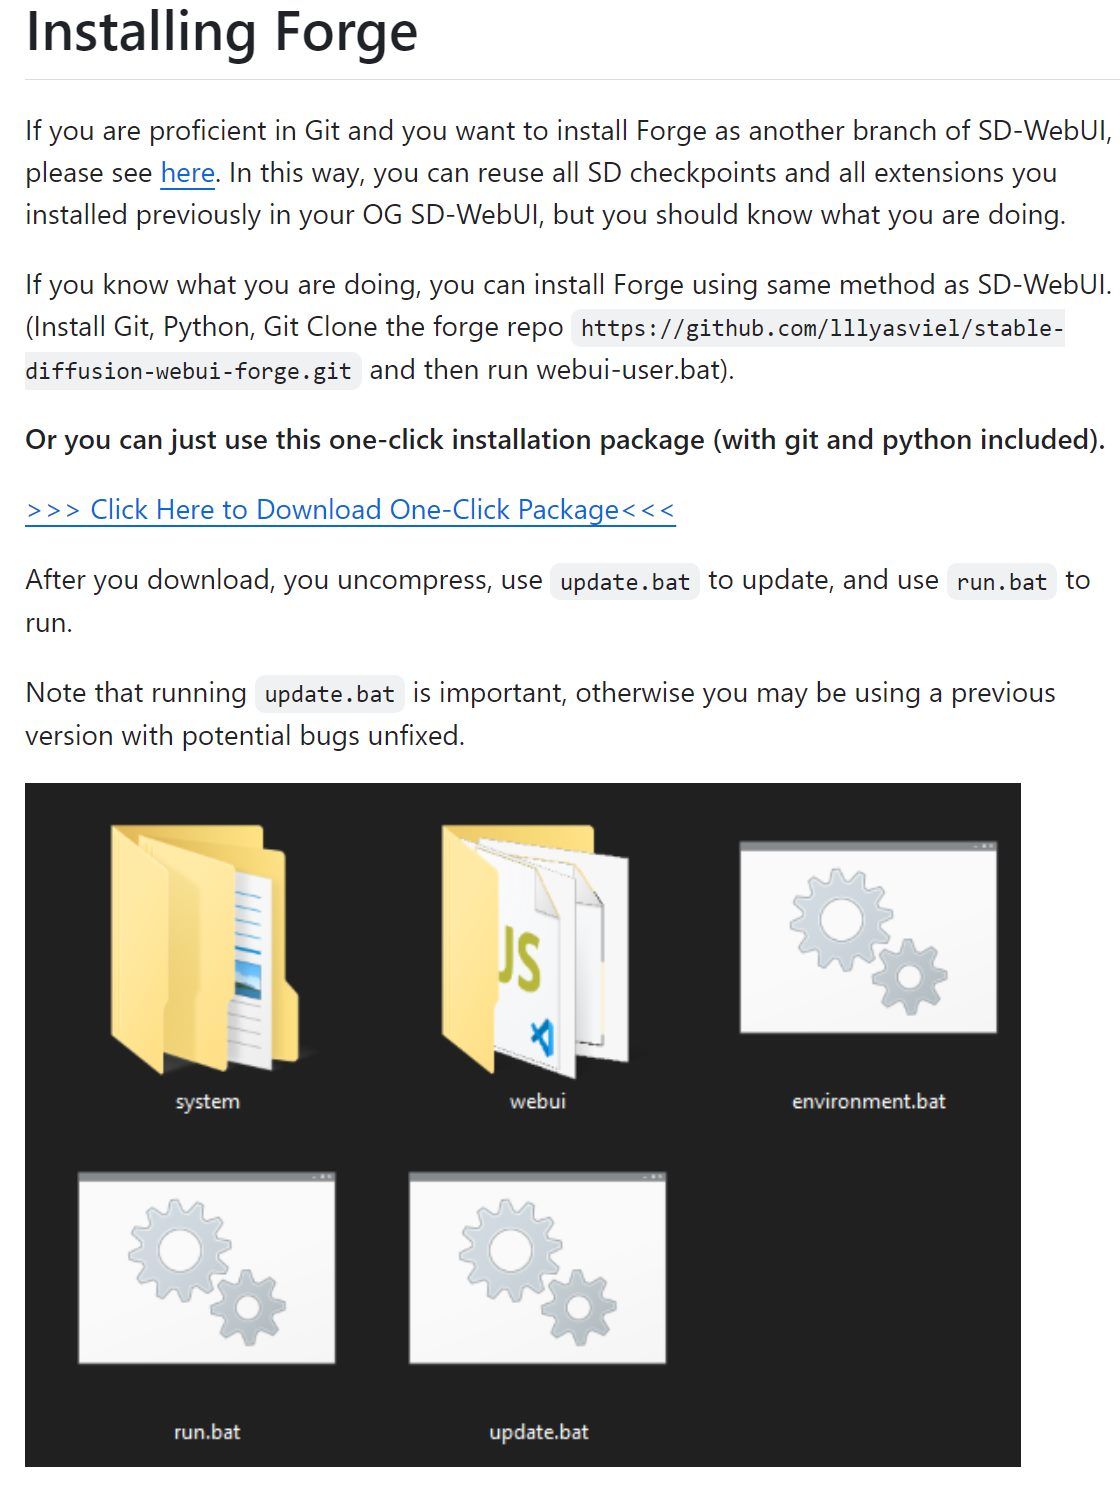
Post-installation, utilizing run.bat launches the application, while update.bat ensures you’re at the forefront of updates, safeguarding against the quirks of obsolescence.
Embarking on Face Swap
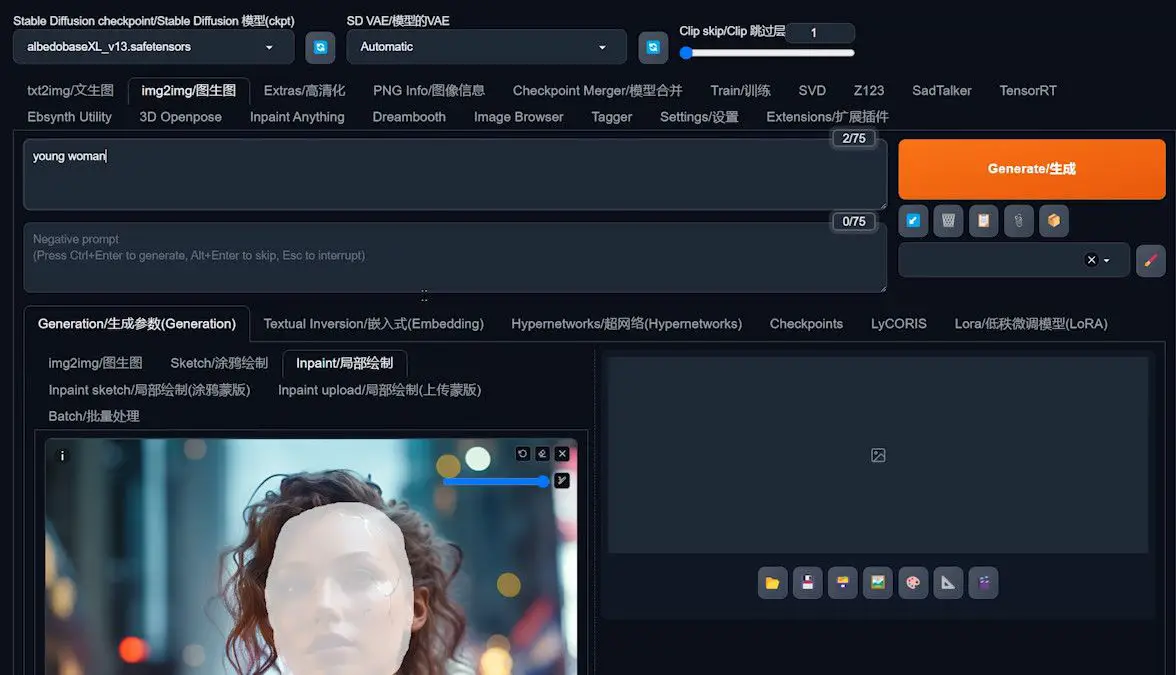
1️⃣ Selecting SDXL Base Model: Initiate by choosing an SDXL base model in WebUI Forge, pivotal for leveraging Instant-ID’s cutting-edge capabilities.
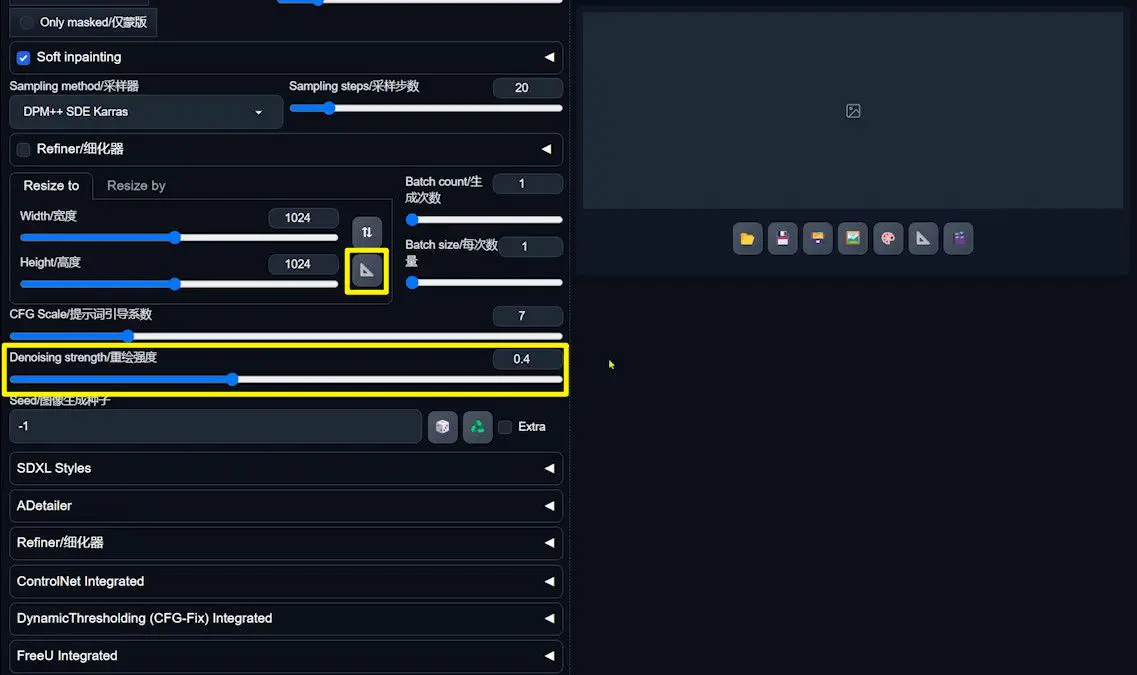
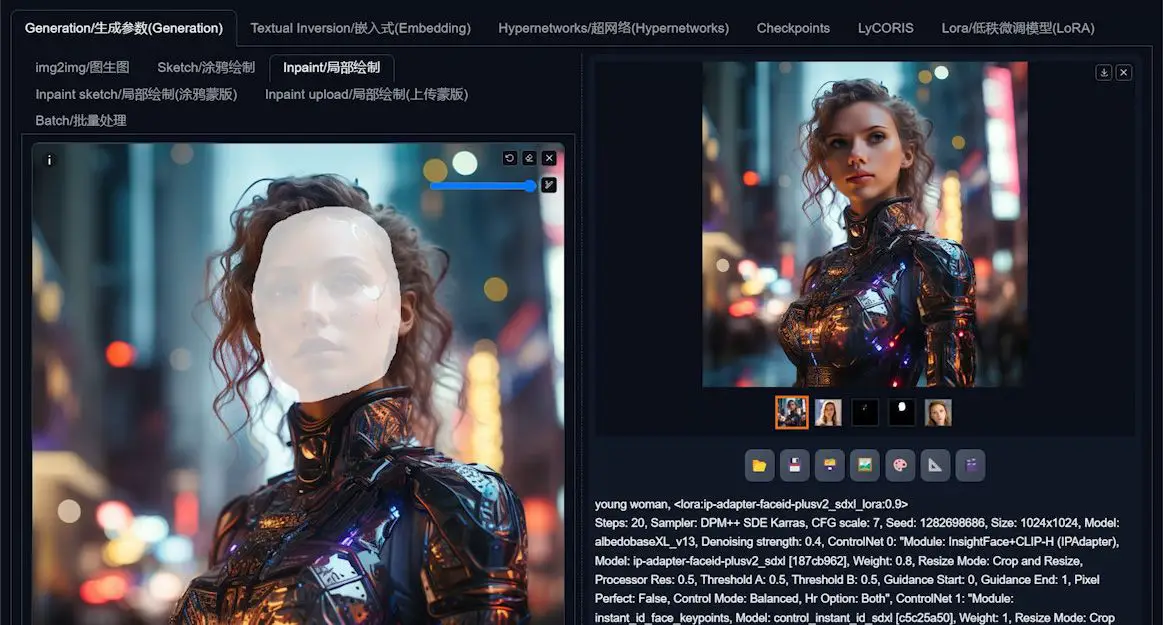
2️⃣ Inpainting and Photo Upload: Navigate to the img2img interface, selecting “inpaint” to prepare your photo for the face swap. Upload and then paint over the face area, ensuring the marked region generously encapsulates the face for optimal adjustments.
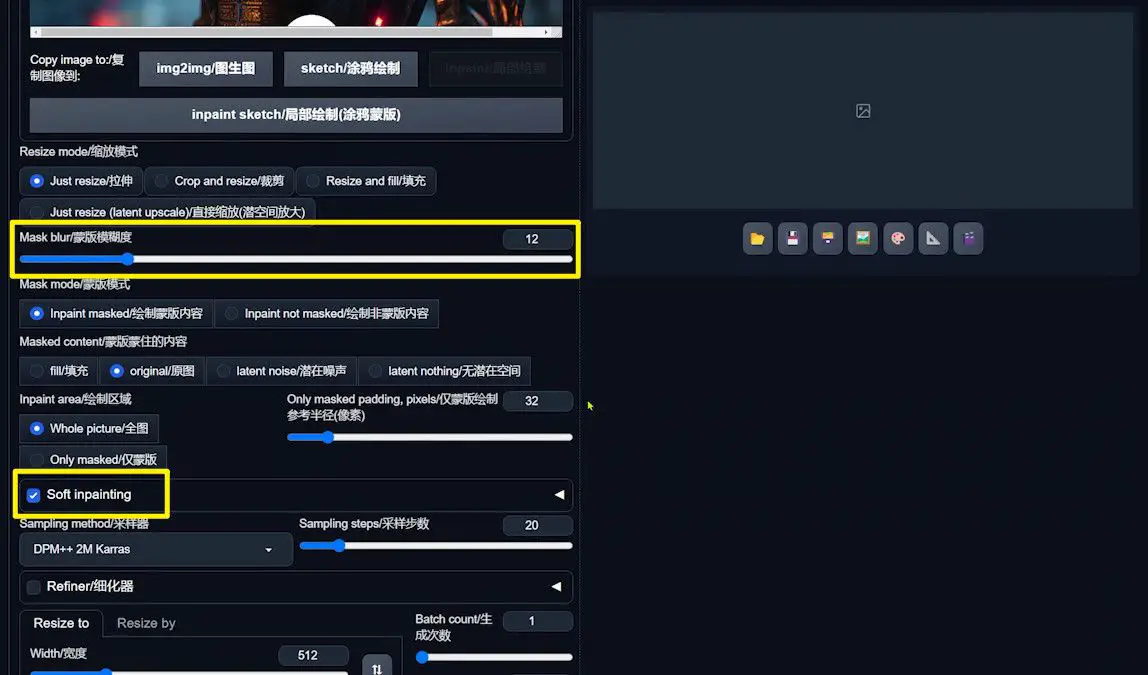
3️⃣ Fine-tuning Mask Blur and Soft Inpainting: Post marking, a slight increase in “mask blur” and enabling “Soft Inpainting” melds the edges seamlessly, enhancing the swap’s authenticity.
4️⃣ Crafting the Prompt and Selection of Sampling Method: Detail the face area in the prompt and judiciously select a “Sampling Method,” pivotal for the swap’s fidelity. Experimentation may be key to finding your ideal setting.
5️⃣ Final Adjustments: Image Dimensions and Denoising Strength
A crucial final touch involves adjusting the image dimensions and denoising strength. Utilize the “Triangle Ruler” icon to match the original image’s width and height, maintaining proportional integrity.
Modulating the “Denoising strength” ensures a smooth transition between the swapped face and the original backdrop. Strike a balance—too much strength may lead to an unnatural appearance, necessitating adjustments based on the preliminary outcomes.
Post-setup, the intricacies of ControlNet come into play, specifically tailoring IP-Adapter and Instant-ID settings to perfection.
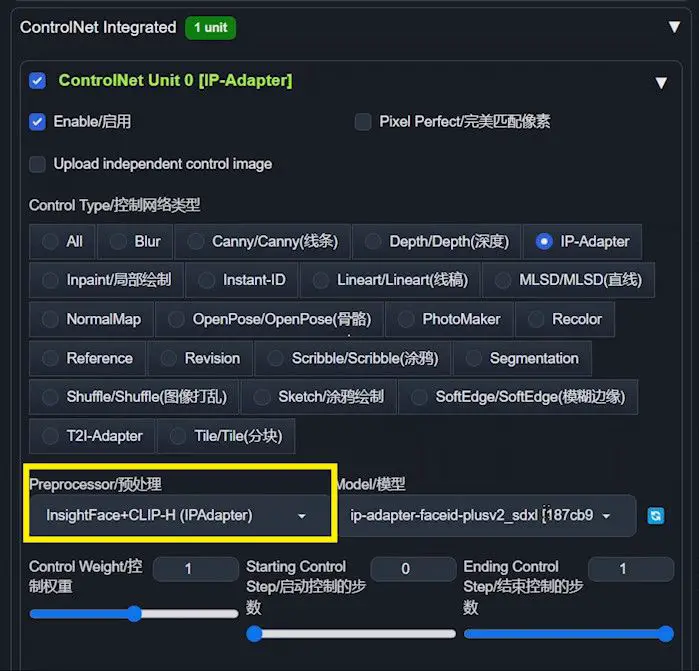
Configuring the First ControlNet with IP-Adapter
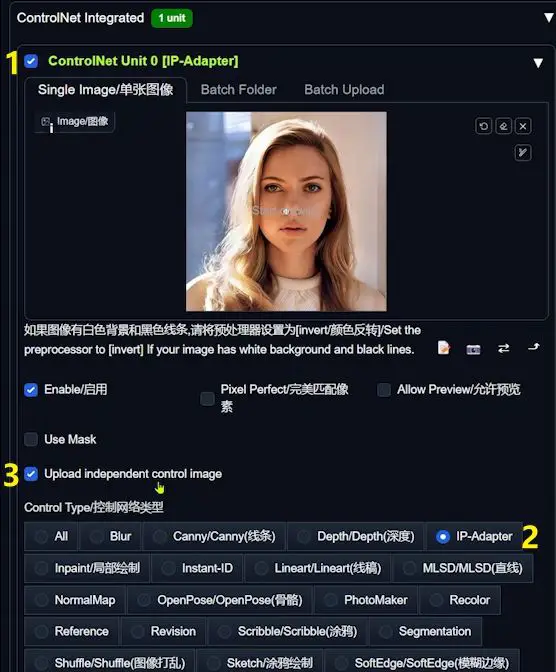
1️⃣ Activating ControlNet
Begin by navigating to the “ControlNet Integrated” section within the WebUI Forge interface.
2️⃣ Selecting IP-Adapter
Within the configuration panel of ControlNet, pinpoint IP-Adapter as your chosen tool. The preprocessor and model associated with IP-Adapter are typically preset, simplifying the setup process. Should you find yourself unfamiliar with IP-Adapter, I recommend perusing my introductory article for a deeper understanding.
3️⃣ Uploading the Control Image
The next crucial step involves uploading a control image. Select “Upload independent control image” and introduce a headshot of Scarlett Johansson (or your chosen subject) into the system.
The choice of headshot is paramount, as it significantly influences the fidelity and overall quality of the face swap. Ensure the chosen image accurately represents the facial features and expression you wish to capture.
4️⃣ Fine-tuning Control Weight
As you progress, you’ll encounter the “Control Weight” setting. This parameter requires a nuanced approach, as there’s no one-size-fits-all setting. Adjust the control weight to modulate the influence of your control image on the final output. This step may require some experimentation to strike the perfect balance for your specific project.
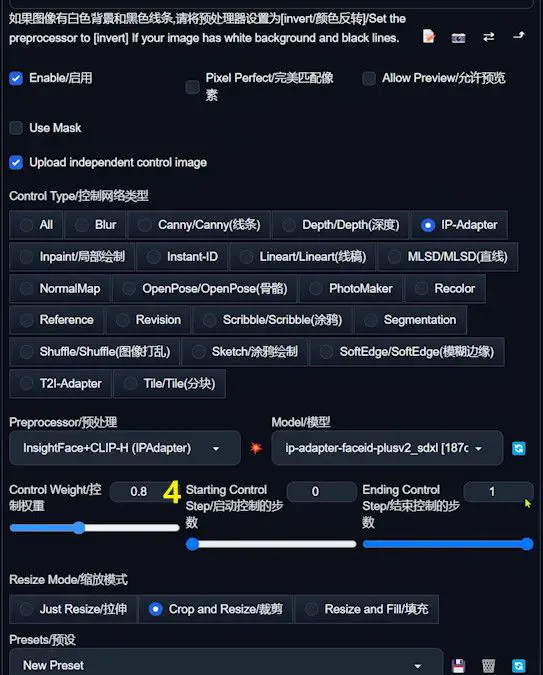
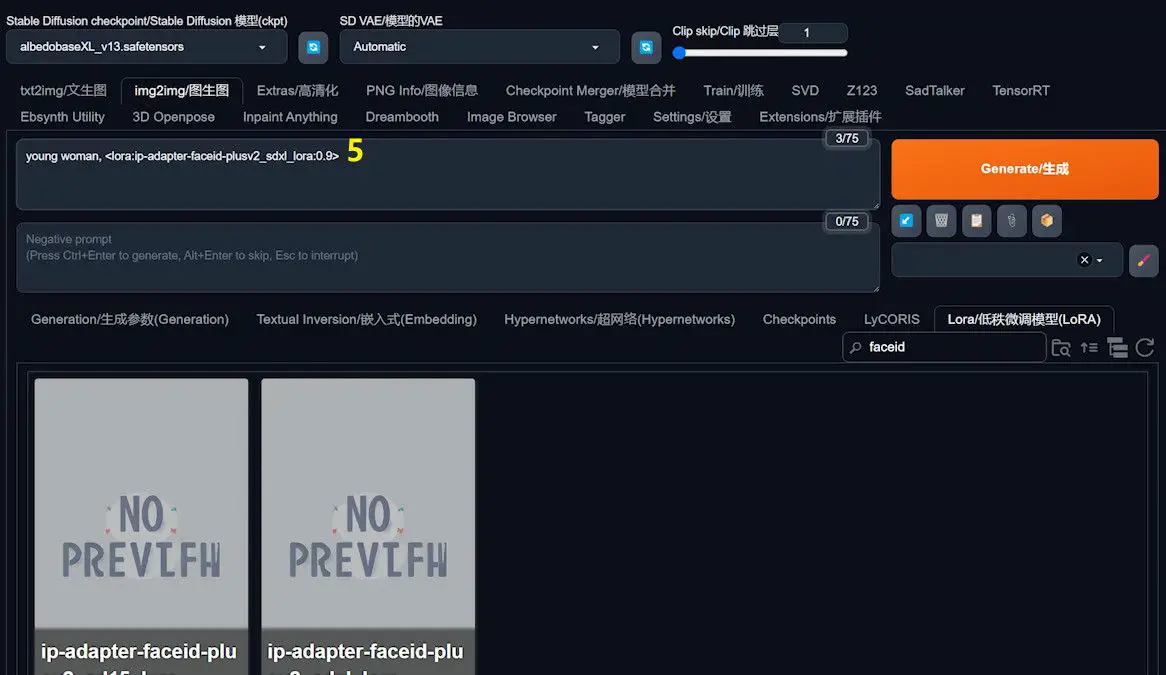
5️⃣ Incorporating LoRA Prompt
Introducing a LoRA prompt into the mix adds an extra layer of refinement to the process. While its impact on the outcome may be subtle, integrating LoRA prompts with IP-Adapter can help in tweaking the minutiae, ensuring your face swap is as precise and detailed as possible.
Mastering the Setup of the Second and Third ControlNets with Instant-ID
To elevate the artistry of face swapping, we transition to refining the second and third ControlNets, harnessing the power of InstantID technology. This segment is meticulously crafted to guide you through the intricate process of integrating InstantID, ensuring a flawless execution of your face swap project.
Embarking on the InstantID Journey
1️⃣Discovering the InstantID Model
Begin your adventure by visiting the specified GitHub page: InstantID on GitHub. This treasure trove contains all the necessary links for the InstantID models alongside comprehensive installation guidance.
2️⃣Acquiring the Models
With the roadmap laid out on the GitHub page, proceed to download the InstantID models.
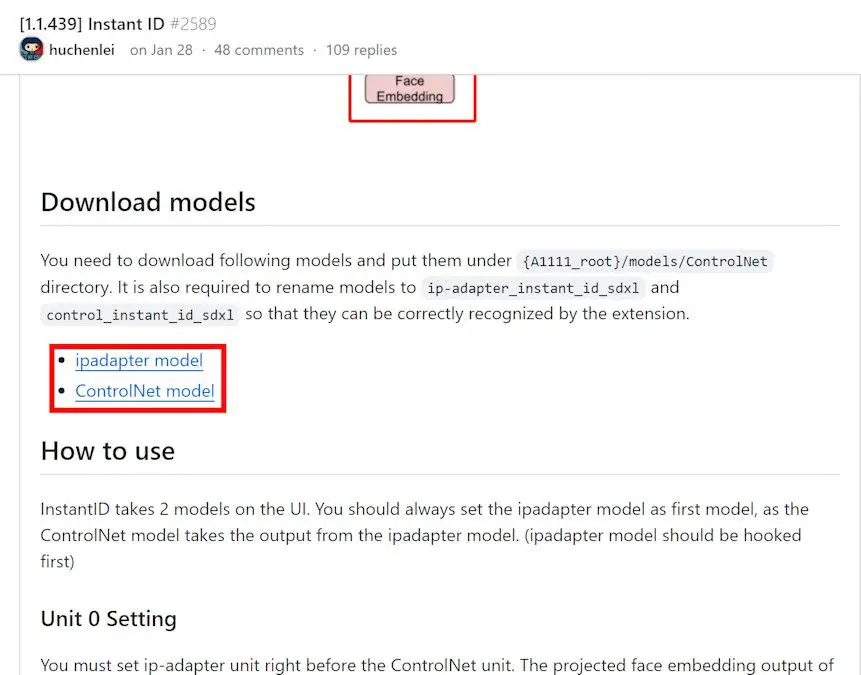
3️⃣Renaming and Organizing the Models
Once the models are in your possession, embark on the following steps to ensure they are primed for integration:
- The first model you downloaded takes on a new identity as
ip-adapter_instant_id_sdxl. - Its counterpart is reborn as
control_instant_id_sdxl. - Both models find their home in the
{A1111_root}/models/ControlNetdirectory, a crucial step for seamless operation within the WebUI Forge environment.
Fine-Tuning the Second ControlNet with InstantID
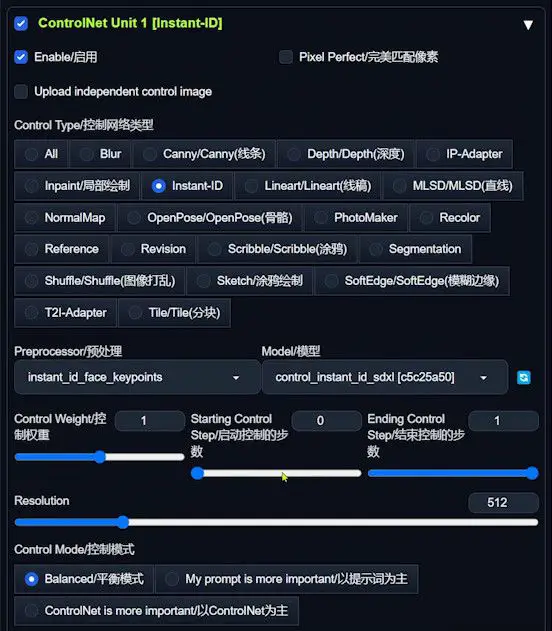
1️⃣ Activating the Second ControlNet
Begin by accessing the WebUI Forge interface, where you’ll find the option to unfold the settings dedicated to the second ControlNet. Here, ensure the “enable” checkbox is marked, signifying the activation of this ControlNet.
2️⃣ Tailoring Configuration Options
With the second ControlNet enabled, we proceed to define its operational parameters, each chosen to optimize the face swapping performance:
- Control Type: Direct your selection towards “InstantID”.
- Preprocessor: Opt for
instant_id_face_keypointsfrom the dropdown menu. This preprocessor is adept at identifying the five key points of a face, a feature that’s paramount for the accurate matching of facial features. - Model: Here, you’ll select
control_instant_id_sdxl, the model you previously downloaded and aptly renamed.
Orchestrating the Third ControlNet
1️⃣ Opting for InsightFace (InstantID)
The journey begins with the selection of InsightFace (InstantID) as the preprocessor.
2️⃣ Choosing the Correct Model
Progressing to model selection, ip-adapter_instant_id_sdxl is the model of choice.
3️⃣ Uploading a Varied Headshot
A strategic move involves uploading a different headshot of Scarlett Johansson (or your chosen subject) compared to the one used in the first ControlNet. This approach leverages the diversity in facial features presented in different photographs, enabling a more versatile and accurate mapping of facial features across the ControlNets.
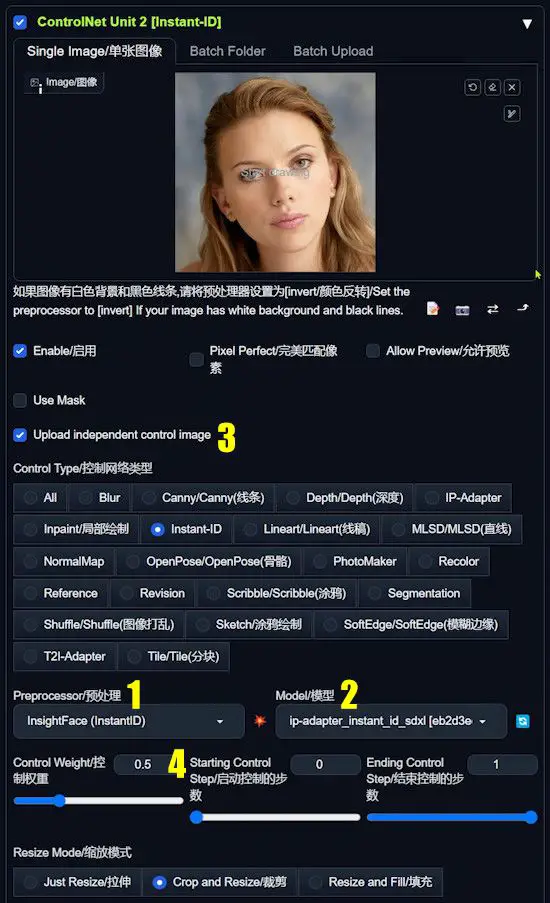
4️⃣ Tailoring Control Weight
The final step in this setup process is the meticulous adjustment of “Control Weight”. This parameter lacks a universal setting, necessitating a personalized approach based on the observed outcomes. It’s a delicate balance, honed through trial and error, to find the sweet spot where the swapped face blends seamlessly with the target image, embodying a natural and convincing appearance.
By adhering to these steps, you’re equipped to unleash the full capabilities of WebUI Forge and ControlNet technology, steering towards a face swap that’s not just accurate but also imbued with a lifelike essence. It’s a testament to the importance of a methodical and thoughtful setup, where each adjustment is a step closer to perfection.
Initiating and Refining Your Face Swap Project
1️⃣ Initiating the Face Swap:
With all settings finely tuned across the ControlNets, it’s time to breathe life into your project. Initiate the face swap process, an endeavor that demands patience as the system meticulously processes through the three ControlNet configurations in sequence.
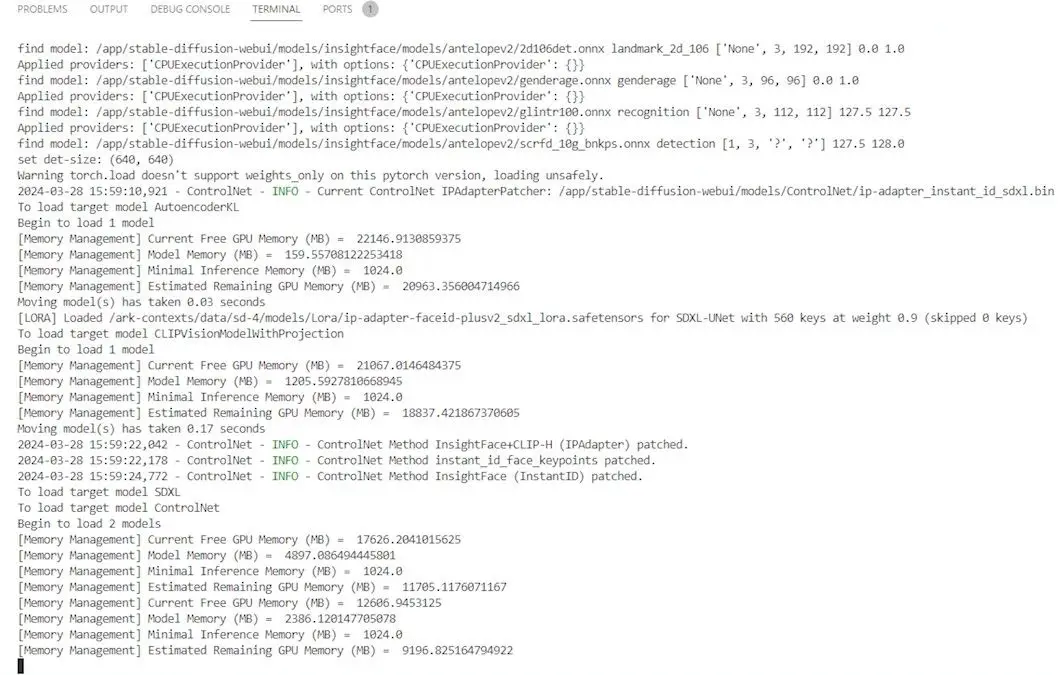
2️⃣ Monitoring Progress:
As your project progresses, keep a vigilant eye on the terminal. This window is not just a backdrop to your endeavors but a vital checkpoint for real-time feedback. Periodically scanning the terminal helps in catching and addressing any anomalies early, ensuring a smooth and uninterrupted creation process.
3️⃣ Reveling in the Results:
The moment of unveiling arrives as the image generation concludes. Navigate back to the WebUI interface, where your creation awaits.
Wrapping Up
The journey through setting up and executing a face swap in WebUI Forge is a blend of art and science. It’s a process that marries technical precision with creative vision, resulting in face swaps that bear a striking resemblance and naturalness.
WebUI Forge stands as a robust toolkit at your disposal, designed to navigate the complexities and nuances of face swapping.
I hope this guide serves as your beacon, illuminating the path to creating face swaps that are not just visually stunning but are also a testament to your mastery over the medium.
Your feedback, likes, and comments fuel the community and the evolution of this fascinating art form.